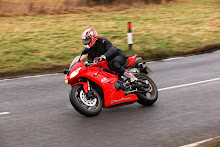
Finally got around to getting a front paddock stand last week so could get on with fitting the new forks, wahoo! Really easy took approximately 30 mins to complete, 60 mins including tea breaks (very very important step in the process!). One piece of advice for anyone doing this is to buy the workshop manual, makes it so simple when you know the torque settings and the tightening orders.
First job remove mudguard, unmount brakes and cable tie to indicators (do not let them hang on brake lines and do not pull brake lever once off discs). Remove front wheel axle bolt and drift front axle through taking off the front wheel.
Then undo all yoke clamp bolts and clip-on bolts and slide out the old forks...

Admire shiny new adjustable Ohlins next to dull old non adjustable OEM forks....

Slide new forks in and (the most important step) polish immediately so you can start admiring and swooning straight away... DO NOT I repeat DO NOT have this moment spoiled with greasy, oily fingermarks all over you Ohlins....

Make tea and acquire the use of some one with little hands and big patience to tighten all the ridiculous bolts on the inside of the fairing that you big hands and little patience will not allow you to reach!

Smile a big smile when your new forks are on!

Refit the front wheel and make sure the axle nut is greased before fitting. Tighten it to the correct setting and set your lovely bike down on it's new legs! It's very important then to polish again... Just in case!
Paul


Did you buy the Ohlins new or are they from another bike? regardless were they expensive? :D
ReplyDeleteWhat is the part number on the ohlins?
ReplyDelete