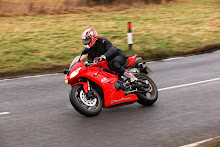
Wednesday 17 June 2009

A bit of leverage

Ok, post numero trois! As things stand...


No, no, no, no, no, that will just not do. Horrible cheap factory fitted things. Down to the garage batman...


Box of beautiful Pazzo levers - Check
10mm spanner - Check
flat head screwdriver - Check
Cup of tea - Check

Right first the brake lever. Remove locking bolt - Done, remove pivot pin - Done, place new lever on bike - Done, Insert pivot pin - Done, lock with locking nut - Done. Ahhh voila, beautiful new brake lever. Easy as pie (mmmmm pie).

Next, the clutch lever. locking nut off, pivot pin out, lever off, unscrew the actuating pin as it's a hydraulic clutch from it's little housing.... man that's tight. Stop put things down. Get better grip and bigger screwdriver.... strip the head of the pivot pin. Swear, retrieve screwdriver from across the garage, swear at it. Get WD40... the solution to EVERYTHING. Liberal spraying, rest for 5 mins. Get pliers, grip pin bottom and turn. Remove shards of aluminium from fingers. Swear. Swear. Swear. Recover pliers from across the road. Swear. Drink now cold tea. Swear at it. Take lever back in flat. cook it on the gas for 2 minutes. Grip with pliers (hard). Turn with all your might. Get hoover. Hoover up shards of metal from floor. Swear. Recover lever from across the room. Place lever, tools, pride back in the garage. Tell girlfriend at length about Italian 'engineering'. Rest.

Next thing said girlfriend appears with mole grips, said offending lever and a smile....

Look on in bewilderment at a half removed pin. Offer help to remove the last bit. Sit back down. Watch as girlfriend proceeds to remove the pin, place the small socket back in the new clutch, re-insert actuator pin and pass it back to you. Swear.

Anyhooo, was probably worth the internal shards of metal because look....


mmmmmmmmm

It starts!

Well the first modification has been done.... I have fitted a tail tidy to address the very serious issue of that ridiculous back end! Really Ducati, what were you thinking. It resembles a strange cyclops type creature with one blinking red eye! Anyway I digress...

Basically it was a Palatov tail tidy for a sport classic, available from http://www.palatov.com/products/motorcycle.html . It had to come from America and took about 10 days to get here, not bad really and very good communication from the guys. Once opened it becomes clear this is a very basic (but well finished) piece of engineering. 2 plates of metal, one bolts to the underneath of the Duc and holds the light assembly, the other holds the reg plate and bolts to the first. You have to swap the indicator cables around as you turn the light cluster upside down (thus L becomes R and so forth).

Unfortunately it is made for USA plates and the screw hols for the plat did not quite line up with the ones in a UK plate. Wahoo first mod and already using a drill, happy days! 4 new holes later and 2 number plate bolts spray painted black and all was complete. Took about 40 mins to do, real simple and looks fantastic.

Currently very happy!


Next job... Pazzo levers just arrived, oh and maybe a smaller number plate :)

Why start a Blog?

Well I have just purchased a lovely shiny (almost) new Ducati Sport Classic 1000S.....


Well I have just purchased a lovely shiny (almost) new Ducati Sport Classic 1000S.....

Very nice I hear you say! However, being somewhat of a perfectionist and havin a bit of spare cash from the sale of my other bike, my PS3, my Kidneys and my soul I have decided to make it ym perfect dream bike. The project brief is thus
  • Must remain classy at all times

  • Must not bankrupt me and must stay on budget

  • Must source all the parts myself

  • My girlfriend and I shall be doing as much work as possible

  • Work that is 'out-sourced' will primarily be paid with beer

  • NO bl**dy carbon fibre (se point 1)

I will be documenting the whole process form conception to end point, detailing my trials, tribulations, celebrations and commiserations throughout. Hopefully by doing this, along with detailed photo's and descriptions of how each part was done i will be able to assist other people starting this journey and also keep track myself!

All comments are appreciated, unless suggesting carbon bl**dy fibre...

Paul and Francine