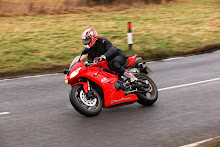
I adored the gold wheels that it (and many other Duc racers of the time) fitted. So whilst part of me was after the performance gain that a saving of 7kg unsprung would give (LOADS!!!) I was also attracted to the classic Ducati red and gold wheels! It took a while to find the right gold but it is worth the hunting.

OK general advice for anyone starting this mod, it is not easy, not cheap, it takes time and it is worth every hour and every penny/cent you spend on it. The results are amazing, the handling literally changes the feel of the bike completely. What follows is a guide on how I did this and I take no responsibility if it does not work for you or you, it is for guidance only! To do it you will need the following
· Pair 749/999 wheels
· Rear 749/999 brake caliper
· Rear 749/999 caliper mounting bracket
· Set of spacers to make the thinner SC1K axle work with the 999 wheels (available from
http://www.performanceparts.de/ )
· Set of 749/999 front brake discs
· 749/999 rear brake disc
· Speedo Healer
· Rear 39tooth Cuacati 749/999 sprocket
· 749/999 sprocket carrier
· Front and rear paddock stand
· Torque wrench
· Grease
· Cable ties
· New rear brake line (optional)
If you want to go the route I did and have them powder coated you are going to need some extra bits and also patience and a reasonable amount of tool knowledge (or a friend who has the same). D have them powder coated you will need the following extra bits
· New set of cush drives (5 in total)
· A good trustworthy powder coater who does not use acid baths
· Set of Marchesini stickers to finish off your wheels!
· Possibly a couple of new tire valves
Removing and fitting the cush drives and bearings Below is a detailed description of how to remove and fit cush drives and bearing s for powder coating purposes. If you do not wish to powder coat I would recommend skipping this bit! Ok first step to powder coating your wheels is to remove everything from them (tires, balancing weights, stickers, tire valves, bearings and cush drives. This is all easy apart from the bearings and cush drives. Bearings can be removed be either using a drift and a hammer (do a Google search many many posts on how to do this) or using a blind bearing puller (my choice). The cush drives are a different matter! You need a blind bearing puller that can fit inside the cush drives and then the puller must be able to expand to lock into the centre whole of the drive and the sides of the puller must then be able to brace on the hub of the wheel.

You then use a spanner to pull the cush drive up as the sides of the puller are pushed down onto the hub. The centre ring will start to life and stretch the rubber and eventually one of two things will happen. The force will over coves the friction of the outer ring of the cush drive and it will pop out (Wahoo) or the force will overcome the strength of the rubber and the centre ring will pop out leaving the rubber and outer ring mounted in the wheel still (doh and double doh). I had 3 of the option a’s and 2 of the option b’s.
If you have any of the second option you are in for a long and painful process unfortunately. Once that happens the only way to remove them is to remove the rubber and then use a hacksaw blade in the drive to cut through the outer shell. The best way I found to remove the rubber is with a hole cutting drill bit in a drill with a good amount of torque. Use this to remove most of the rubber and then finish it off with a propane torch. Once you have done this use a hack saw blade wrapped in a clots(to save your finger tips) to cut on 2 sides of the cush drive all the way through. I then used a chisel and hammer to fold the inner metal sleeve in on itself and then mole grips to pull it out. Took about 40 mins to do each one but worked very well and probably sounds more work than it actually is. The longest part is the slow process of cutting.
Once this is done you can have your wheels powder coated! When you get them back there is then the process of putting the cush drives and bearings back in. It is important this is done perfectly so don’t try and bodge this bit! To put the bearings in I used lots of grease and a socket with the same size head as the outer ring of the bearing. I then used a dead hammer to knock them in straight. After doing this I have received much better advice which is to freeze the bearings and they will shrink and drop into the whole much more easily (This is the way I will go in future). The cush drives are a much bigger problem due to the very tight fit. I had my girlfriend take them into work and had them put in using a hydraulic press, this worked perfectly.
Fitting the wheels
Front – This is easy as pie. Remove the existing wheel and the 2 spacers from it. Unbolt your calipers and use cable ties to hang them off your indicators (do not bend the lines too much) Fit your 749/999 brake discs and the 2 spacers to your new wheel. Slide the axle through the spacer-hib-spacer. Re-fit your brake calipers, ensure the axle is pushed all the way in and the wheel does not move side to side. Tighten your fork bolts and drop the bike down onto its front wheel (this will seat the wheel on the axle correctly. Tighten up your axle bolt and stand back and admire your work!

Rear – This is a little more complicated. To remove the rear wheel follow the guide in the workshop manual (a definite purchase if you are doing this mod and only a couple of quid of eBay). Bleed the rear brake caliper and remove as one with the mounting bracket. Fit the spacers to the new wheel as per the instructions that come with them. Fit the sprocket onto the sprocket carrier and the rear caliper onto the caliper mounting bracket. Now here is the difficult part that is so so so much easier with two people! You need to line up the SC1K swing arm spacers with the rear wheel and the rear brake calliper mounting bracket. It is a very tight fit and needs patience. Once they are lined up knock the rear axle through and re0fit the chain to the correct tension. I found that the rear line on the SC1K was overly complicated and convoluted and also the banjo fittings were the wrong angle for the new calliper so used the opportunity to change the brake line too. I used the Goodridge build a line kit which was fantastic. I used a 40cm line a straight banjo and a 20 degree banjo to fit perfectly (see pic for cable routing).

Once all is fitted it is worth checking the rear brake works or if it needs more bleeding, check the chain tension when sat on the bike, ensure the wheels are aligned and the axle tightened to the right torque.
Enjoy!